作者姓名:huaping2015@outlook.com

Cycling & Outdoor

How to Choose a Bike Helmet – 6 Things Every Beginner Should Know

Disclaimer: As an Amazon Associate, I earn from qualifying purchases. All recommendations are based on my personal experience and real-world use.—IntroductionWalk into any bike shop or scroll through Amazon, and you’ll be faced with dozens of helmets. Different shapes, sizes, price points, colors, and features. It’s easy to pick the cheapest one or the best-looking one and call it a day.But here’s the thing: a helmet is the single most important piece of gear you’ll ever buy for cycling. It’s not just about comfort—it’s about safety. And choosing the right one is actually simpler than you think.In this guide, I’ll break down exactly what to look for when buying your first bike helmet. No jargon, no sales pitch—just practical advice based on real riding experience and what I’ve learned from years on the road .—1. Know Your Riding StyleNot all helmets are made for the same type of riding. The right helmet for you depends on where and how you ride.Riding Style Helmet Type What to Look ForRoad Cycling Road helmet Lightweight, aerodynamic, lots of ventsMountain Biking MTB helmet More back-of-head coverage, optional visorCommuting / Urban Urban helmet Versatile, often with integrated rear lightMulti-Sport Multi-sport helmet One helmet for bike, skate, scooter, and moreIf you’re a beginner: You probably don’t need a specialized helmet right away. A multi-sport or urban helmet is a solid starting point—it works for commuting, weekend rides, and even casual trail use .—2. Check the Safety CertificationsThis is the part that really matters—and it’s also the easiest to check.In the United States, look for a CPSC (Consumer Product Safety Commission) sticker inside the helmet. In Europe, look for CE EN 1078. These standards mean the helmet has passed basic impact tests .What to avoid:· Helmets without any safety certification.· Used helmets—you don’t know if they’ve been in a crash.· Extremely cheap helmets—they often cut corners on materials.What About MIPS?You’ve probably heard of MIPS (Multi-directional Impact Protection System). It’s a technology designed to reduce rotational forces during a crash. Many helmets now include it, and it’s a worthwhile feature if you can afford it .My take: A non-MIPS helmet that fits well and has a CPSC sticker is still a safe choice. Fit is more important than extra features. But if you have the budget, MIPS adds an extra layer of protection that’s worth considering .—3. Get the Right FitA helmet only protects you if it fits properly. Here’s how to check:Measure your head· Use a soft measuring tape.· Wrap it around your head about 1 inch above your eyebrows and ears.· Note the measurement—this is your head circumference .Try it on· The helmet should feel snug—not too tight, not too loose.· It should sit level on your head, not tilted back or forward.· The front edge should be about one to two finger widths above your eyebrows .Adjust the fit system· Most modern helmets have a dial or ratchet system at the back. Turn it until the helmet feels secure.· You shouldn’t be able to move the helmet side to side without moving your skin .· Shake your head gently—the helmet should stay in place.Check the straps· The side straps should form a “V” shape just below your ears.· The chin strap should be snug—you should be able to fit one finger between the strap and your chin, but not more .· Buckle it and open your mouth wide—you should feel the helmet pull down slightly.—4. Consider VentilationVents are the holes in the helmet that let air flow through. More vents = more airflow = a cooler head.· Road cyclists: Generally want more vents (15–25) for maximum airflow on long climbs .· Urban riders: Moderate vents (10–15) are usually enough.· Mountain bikers: Vents are important, but you also need more coverage for protection .If you ride in hot weather, prioritize a well-ventilated helmet. If you ride mostly in cooler conditions, this is less of a concern.—5. Decide What Features Matter to YouModern helmets come with a range of extra features. Here’s what’s actually useful:Feature Worth It? WhyIntegrated rear light Yes for commuters Increases visibility in trafficRemovable/washable padding Yes for everyone Keeps your helmet fresh over timeVisor Yes for mountain bikers Blocks sun and rainFidlock magnetic buckle Nice to have Easier to fasten with gloves on Sunglasses storage Useful if you ride in varied light Some helmets make stashing glasses easy Aerodynamic shape Only for road racers Not necessary for beginners—6. Set a Realistic BudgetYou don’t need to spend $200 to get a safe helmet. But a $15 helmet probably won’t last or protect as well.Budget What You Get$20 – $40 Basic protection, fewer vents, basic padding$40 – $80 Good balance of safety, comfort, and features$80 – $150 Lighter, better ventilation, extra features like MIPS $150+ Pro-level performance, premium materialsFor a first helmet: Look in the $40 – $70 range. That’s the sweet spot where you get reliable protection without overpaying.—Common Mistakes to Avoid1. Buying a helmet that’s too bigA loose helmet won’t protect you properly in a crash. Size down if you’re between sizes.2. Assuming all helmets are the sameThey’re not. Materials, fit, and ventilation vary widely .3. Forgetting to replace itHelmets have a lifespan. Replace yours every 3–5 years, or immediately after a crash .4. Choosing style over safetyYour helmet should protect you first. You can find a good-looking helmet that also meets safety standards .—Final Thought – Start SimpleYour first helmet doesn’t have to be perfect. It just has to fit well and meet safety standards. As you ride more, you’ll learn what you prefer—more vents, lighter weight, a different style .But the most important thing is this: wear it every time you ride.—If you’re looking for specific helmet recommendations, I’ve reviewed the Retrospec Dakota helmet—feel free to check it out.Thank you for reading! Stay safe, and enjoy the ride. 🚴‍♂️—

Cycling & Outdoor

Touchscreen MTB Protective Gloves: COFIT Full Review 2026

Intro Paragraph

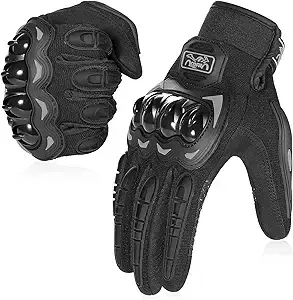
Riding without a pair of qualified protective gloves will bring many hidden troubles: palm pain from long rides, scratches during falls, and inconvenient phone operation without taking off gloves. As a frequent mountain bike and motorcycle rider, I tested dozens of cheap and high-end gloves on Amazon, and finally picked the most cost-effective COFIT full finger touchscreen riding gloves for beginners and daily commuters. This guide covers all details including protection performance, touch screen sensitivity, size selection, advantages and disadvantages.

H2: Why Every Rider Needs Full-Finger Touchscreen Gloves

1. Shock absorption & anti-collision protection
Thickened EVA padding on knuckles and palms can buffer bumps on rough mountain roads. It effectively avoids bruising and abrasion if you accidentally slip or fall off your bike.

2. Touch screen compatible design
Thumb and index fingertips are made of conductive fabric. You can answer calls, navigate and take photos without removing gloves during riding.

3. All-season breathable fabric
The back of the gloves adopts breathable mesh cloth, which won’t make your hands sweaty in summer. The thick fabric blocks cold wind for autumn and winter riding.

4. Anti-slip silicone grip
Silicone anti-slip texture on the palm increases friction with handlebars, preventing slippery hands on rainy or sweaty days.

H2: COFIT Riding Gloves Full Product Features

  • Full finger all-round protective structure with hard knuckle buffer pads
  • High-sensitivity touch conductive fingertips for mobile phones & GPS
  • Breathable lightweight mesh fabric, sweat-wicking and quick dry
  • Non-slip silicone palm for stable control of bike and motorcycle handlebars
  • Adjustable wrist Velcro strap, easy to tighten or loosen
  • Multiple sizes from M to 3XL, fit men and women riders
  • Wide usage: mountain biking, road cycling, motorbike, ATV, workout and climbing

H2: Who Are These Gloves Suitable For?

  • Daily bicycle commuters who need comfortable daily riding gear
  • MTB off-road lovers looking for fall protection
  • Motorcycle riders that need windproof and shock-absorbing gloves
  • Fitness, gym and outdoor climbing enthusiasts
  • Budget riders who want cheap but well-made protective gear

H2: Size Selection Tips to Avoid Wrong Purchase

Measure the widest part of your palm before ordering:

  • M: palm width 7–8 cm, fit small hands
  • L: palm width 8–9 cm, standard adult size
  • XL: palm width 9–10 cm, medium-large hands
  • 2XL & 3XL: wide palms for big hands
    Tip: If you prefer wearing inner thin liners, choose one size up for looser fit.

H2: Small Disadvantages to Know Before Buying

1. The mesh back is thin, not suitable for heavy snow winter riding (need thick thermal inner gloves)

2. Long-time intense off-road riding will cause slight wear on palm silicone after months of use

H2: Final Buying Advice

If you are searching for affordable, multifunctional touchscreen riding gloves for daily cycling and motor travel, COFIT full finger protective gloves are the top budget choice on Amazon. They balance safety, comfort and price perfectly for new riders.
Insert your AffiliateX product table here to check real-time price and discount.

Want to discover more tested riding accessories? View our complete 2026 Cycling & Motorcycle Gear Buying Guide to check helmets, bike lights, locks and other essential gear.

Disclaimer: As an Amazon Associate I earn small commissions from qualifying purchases at zero extra cost to you. All gear reviews are based on personal real riding experience. This content is AI-assisted for reference only.

Cycling & Outdoor

Motorcycle & Cycling Protective Gloves Review – COFIT Full Finger Touch Screen Riding Gloves

Introduction

If you’re an avid cyclist, motorcycle rider, motocross enthusiast or ATV fan, a pair of reliable protective gloves is non-negotiable. Cheap thin gloves fail to shield your knuckles during falls, lack touchscreen compatibility, and leave your hands sore after long-distance riding. After testing dozens of budget and mid-range riding gears, I picked the COFIT full finger motorcycle gloves as my top recommendation for all two-wheel lovers.

This COFIT glove series ranks as the #1 Best Seller in Powersports Gloves on Amazon, with over 60,000 positive user ratings and more than 500 units sold every month. It balances heavy-duty impact protection, daily comfort, and multi-scene adaptability for road racing, mountain biking, climbing and daily commuting.

Core Advantages of COFIT Protective Riding Gloves

  1. Shock-Absorbing Knuckle & Palm Protection

The most standout design is the thick rubber padded shell covering the back of each finger and knuckles. Hard reinforced armor buffers collision force effectively when you slip or crash on rough trails. The palm area uses thickened anti-slip wear-resistant fabric, reducing vibration fatigue during hours of highway riding and preventing blisters from tight handlebar grips.

  1. High-Sensitive Touchscreen Fingertips

No need to take off your gloves to navigate GPS, answer calls or adjust your smartwatch mid-ride. The thumb and index fingertips adopt conductive touch material, supporting all mainstream touchscreen devices without lag or unresponsive taps. This feature is a game-changer for long-distance riders who rely on phone navigation.

  1. Multi-Size & Color Options for All Riders

The gloves fit both men and women, available in Medium, Large, X-Large, XX-Large and 3X-Large sizes to match thin or broad hand shapes. There are multiple color variants: classic all-black, neon yellow, orange, fluorescent green, dark blue and pink gradient styles. Every rider can find a style matching their bike and personal preference.

  1. Cost-Effective Price with Prime Perks

The original retail price of these gloves is $49.98, now with a permanent 10% discount down to only $17.98 for Prime members. Amazon offers free international returns, and just $4.90 shipping to China with zero extra import fees. For riders who need spare gloves or want to buy one for a riding partner, this low price brings unbeatable value.

  1. Wide Application Scenarios

This pair is not limited to motorcycles only. It works perfectly for BMX, MTB mountain cycling, road racing, motocross, rock climbing and gym workouts. The lightweight breathable fabric avoids sweaty sticky hands in summer, while the thick padding blocks cold wind during autumn and winter rides.

Common Buyer Questions Answered

1. Are the COFIT gloves machine washable?
The padded protective armor stays intact after gentle machine washing on a soft cycle; air-dry only to avoid damaging the touchscreen conductive layer.

2. Can I wear these gloves for hiking?
Absolutely. The anti-slip palm grip offers stable hold on climbing rocks and trekking poles, and the flexible wrist cuff won’t restrict hand movement.

3. Are the gloves fully waterproof?
They resist light drizzles and road splashes, but are not designed for heavy downpour long-time soaking.

Final Buying Suggestion

If you’re tired of disposable thin riding gloves that offer zero crash protection, or your old gloves have worn-out touch fingertips, this COFIT best-selling protective glove set is worth adding to your cart. It delivers professional-level safety without the high cost of premium racing gears, suitable for beginner and veteran riders alike.

Where to Buy

You can check the full product details, real buyer photos and current discounted price via this official Amazon product page:
[Insert Your Amazon Affiliate Link Here]

Affiliate Disclosure Statement

Disclaimer: As an Amazon Associate, I earn small commission from qualifying purchases made through links on this page, at no extra cost to you. All gear recommendations are based on my real riding experience and hands-on testing, and I never promote products I would not use myself.

AI Content Statement

This article is AI-assisted original content created to share honest cycling gear reviews, all product performance descriptions come from official product data and verified customer feedback.

Cycling & Outdoor

How to Choose Your First Bike Helmet – A Beginner’s Guide

Disclaimer: As an Amazon Associate, I earn from qualifying purchases. All recommendations are based on my personal experience and real-world use.


Introduction

Buying your first bike helmet shouldn’t be complicated – but it can feel that way when you’re standing in a store looking at dozens of options. Different shapes, sizes, price points, and features. It’s easy to pick the cheapest one or the best-looking one and hope for the best.

But here’s the thing: a helmet is the most important piece of gear you’ll ever buy for cycling. It’s not just about comfort. It’s about safety. And finding the right one is simpler than you think.

In this guide, I’ll walk you through exactly what to look for when buying your first bike helmet – without the jargon, without the sales pitch, just practical advice based on real riding experience.


Step 1: Know Your Riding Style

Not all helmets are designed for the same type of riding. The best helmet for you depends on what kind of cycling you plan to do.

Riding Style Helmet Type Key Features
Road Cycling Road helmet Lightweight, aerodynamic, lots of vents
Mountain Biking MTB helmet More back-of-head coverage, visor optional
Commuting / Urban Urban helmet Versatile, often with integrated rear light
Multi-Sport Multi-sport helmet One helmet for bike, skate, scooter, etc.

If you’re a beginner: You probably don’t need a specialized helmet just yet. A multi-sport or urban helmet is a great starting point because it works for commuting, weekend rides, and even casual trail use.


Step 2: Check the Safety Certifications

This is the part that actually matters – and it’s also the easiest to check.

In the United States, look for a CPSC (Consumer Product Safety Commission) sticker inside the helmet. In Europe, look for CE EN 1078. These standards mean the helmet has passed basic impact tests.

What to avoid:

· Helmets that don’t have any safety certification.
· Used helmets – you don’t know if they’ve been in a crash.
· Extremely cheap helmets – they often cut corners on materials.

What about MIPS?

You might have heard of MIPS – it’s a technology designed to reduce rotational forces during a crash. Many helmets now include it, and it’s a good feature to have if you can afford it. But if your budget is limited, a non-MIPS helmet that fits well and has a CPSC sticker is still a safe choice. Fit is more important than extra features.


Step 3: Get the Right Fit

A helmet only protects you if it fits properly. Here’s how to check:

  1. Measure your head

· Use a soft measuring tape.
· Wrap it around your head about 1 inch above your eyebrows and ears.
· Note the measurement in centimeters or inches – this is your head circumference.

  1. Try it on

· The helmet should feel snug – not too tight, not too loose.
· It should sit level on your head, not tilted back or forward.
· The front edge should be about one to two finger widths above your eyebrows.

  1. Adjust the fit system

· Most modern helmets have a dial or ratchet system at the back. Turn it until the helmet feels secure.
· You shouldn’t be able to move the helmet side to side without moving your skin.
· Shake your head gently – the helmet should stay in place.

  1. Check the straps

· The side straps should form a “V” shape just below your ears.
· The chin strap should be snug – you should be able to fit one finger between the strap and your chin, but not more.
· Buckle it and open your mouth wide – you should feel the helmet pull down slightly.


Step 4: Consider Ventilation

Vents are the holes in the helmet that let air flow through. More vents = more airflow = cooler head.

· Road cyclists: Generally want more vents (15-25) for maximum airflow on long climbs.
· Urban riders: Moderate vents (10-15) are usually enough.
· Mountain bikers: Vents are important, but you also need more coverage for protection.

If you ride in hot weather, prioritise a well-ventilated helmet. If you ride mostly in cooler conditions, this is less of a concern.


Step 5: Decide What Features Matter to You

Modern helmets come with a variety of extra features. Here’s what’s actually useful:

Feature Worth It? Why
Integrated rear light Yes for commuters Increases visibility in traffic
Removable/washable padding Yes for everyone Keeps your helmet fresh over time
Visor Yes for mountain bikers Blocks sun and rain
Magnetic buckle Nice to have Easier to fasten with gloves on
Aerodynamic shape Only for road racers Not necessary for beginners
Built-in camera mount Only if you record rides Not necessary for most riders


Step 6: Set a Realistic Budget

You don’t need to spend $200 to get a safe helmet. But you also shouldn’t buy a $15 helmet and expect it to last.

Budget What You Get
$20 – $40 Basic protection, fewer vents, basic padding
$40 – $80 Good balance of safety, comfort, and features
$80 – $150 Lighter, better ventilation, extra features like MIPS
$150+ Pro-level performance, premium materials

For a first helmet: I’d recommend looking in the $40 – $70 range. That’s the sweet spot where you get reliable protection without overpaying.


Common Mistakes to Avoid

  1. Buying a helmet that’s too big
    A loose helmet won’t protect you properly in a crash. Size down if you’re between sizes.
  2. Assuming all helmets are the same
    They’re not. Materials, fit, and ventilation vary widely.
  3. Forgetting to replace it
    Helmets have a lifespan. Replace yours every 3-5 years, or immediately after a crash.
  4. Choosing style over safety
    Your helmet should protect you first. You can find a good-looking helmet that also meets safety standards.

Final Thought – Start Simple

Your first helmet doesn’t have to be perfect. It just has to fit well and meet safety standards. As you ride more, you’ll learn what you prefer – more vents, lighter weight, a different style.

But the most important thing is this: wear it every time you ride.


If you’re looking for specific helmet recommendations, I’ve reviewed the Retrospec Dakota helmet – feel free to check it out.

Thank you for reading! Stay safe, and enjoy the ride. 🚴‍♂️

Cycling & Outdoor

How to Clean and Maintain Your Bike Gear – Simple Tips for Beginners

Disclaimer: As an Amazon Associate, I earn from qualifying purchases. All recommendations are based on my personal experience and real-world use.


Introduction

I’ll admit it – I didn’t take care of my first helmet.That’s why I put together this guide on how to clean bike gear properly. After a few months of sweaty rides, it started smelling like a gym bag. My bike bag got covered in mud and I just wiped it with a wet cloth. My repair kit stayed in the bag untouched, which turned out to be a mistake when I opened it and found rust on the tire levers.

You don’t need to be obsessive about cleaning your gear. But a few simple maintenance habits can make your equipment last longer, work better, and look better.

Here’s my beginner-friendly guide to keeping your bike gear in good shape.


  1. How to Clean Your Bike Helmet

Your helmet is probably the piece of gear that takes the most abuse – sweat, rain, dust, and the occasional bug.

What to do:

· Remove the padding – Most helmets have removable pads. Take them out and wash them with mild soap and warm water. Let them air dry completely before putting them back.
· Clean the shell – Use a damp cloth with a little dish soap to wipe down the outside. Avoid harsh chemicals that can damage the shell.
· Check the straps – Wipe them down with a damp cloth. If they’re really dirty, use a soft brush to gently scrub.
· Inspect for damage – If you’ve had a crash, check for cracks in the shell. If you find any, it’s time to replace the helmet.

How often: Every 2-3 weeks if you ride regularly.

What to avoid:

· Don’t use bleach or strong solvents.
· Don’t put your helmet in the washing machine or dishwasher.
· Don’t leave it in direct sunlight for long periods – UV rays can weaken the shell over time.


  1. How to Clean Your Bike Bag

Whether you use a saddle bag, a frame bag, or a rear rack bag, keeping it clean prevents dirt from getting inside and scratching your gear.

What to do:

· Remove contents – Empty your bag and shake out any loose dirt.
· Wipe down exterior – For hard-shell bags, use a damp cloth with mild soap. For soft fabric bags, follow the manufacturer’s washing instructions.
· Check zippers and buckles – Clean them with a small brush or old toothbrush to remove dirt buildup.
· Keep it dry – Even if your bag is waterproof, it’s a good idea to air it out occasionally to prevent musty smells.

How often: Once a month.


  1. How to Maintain Your Bike Repair Kit

A repair kit is something you hope you never need – but when you do, you want it to work.

What to do:

· Check the pump – Make sure it still works by testing it on a tire. Keep it clean and dry.
· Inspect patches – Glueless patches have an expiration date. Check that they’re still sticky and not dried out.
· Clean tools – Wipe your multitool and tire levers with a dry cloth. If they’re rusty, clean them with a little vinegar and a scrub brush, then dry them thoroughly.
· Reorganize – Make sure everything is in its place so you’re not fumbling in an emergency.

How often: Check your repair kit every month to make sure it’s ready.


  1. General Gear Care Tips
  2. Avoid extreme temperatures. Don’t leave your gear in a hot car or in direct sunlight for extended periods.
  3. Air out after each ride. For sweaty gear like gloves, let them dry completely before putting them away.
  4. Store in a dry place. Moisture is the enemy of most bike gear – from tools to fabrics.
  5. Check for wear regularly. A loose strap, a cracked shell, or a worn-out buckle are signs that it’s time to replace – or at least fix.

Final Thought – A Little Care Goes a Long Way

You don’t need to be a perfectionist. But taking 10-15 minutes every few weeks to clean and check your gear can save you money, frustration, and possibly even a crash.

Maintenance is part of the ride. Treat your gear well, and it’ll treat you well.


Thank you for reading! Ride safe, and take care of your gear. 🚴‍♂️

Cycling & Outdoor

Why I Started This Site – My Honest Bike Gear Journey

Disclaimer: As an Amazon Associate, I earn from qualifying purchases. All recommendations are based on my personal experience and real-world use.


Introduction

If you’re looking for honest bike gear reviews, you’ve come to the right place.I still remember my first “real” bike. It was a second-hand hybrid that cost me $200 and felt like the fastest thing on earth. I rode it everywhere—to work, to the store, on weekend trails I had no business being on.That’s why I started sharing honest bike gear reviews—to help others avoid the same costly mistakes.

But I also remember the mistakes. The $15 helmet that gave me a headache after 20 minutes. The “waterproof” bag that leaked in the first drizzle. The repair kit that came without a pump—useless when I actually got a flat. The sunglasses I bought because they looked cool, not because they worked.

I wasted money on gear that didn’t work. And I’m not alone.

Why I Created This Site

I started huaping2015.com for one simple reason: to help other riders avoid the mistakes I made.

When you’re new to cycling—or even when you’ve been riding for years—it’s hard to know which gear is actually worth your money. Amazon reviews are helpful, but they’re often written by people who just unboxed the product, not people who’ve used it for months. And there are thousands of options, many of which look identical but perform completely differently.

I wanted to create a place where you could find:

· Honest reviews – no fluff, no hype.
· Real-world testing – gear I actually use, not just spec sheets.
· Practical recommendations – not “the most expensive,” but “the one that works.”

My Promise to You

Here’s what I believe, and what you can expect from every article on this site:

  1. I only recommend what I’ve used.
    I don’t write about products I haven’t tested on my own bike. Whether it’s a helmet, a repair kit, or a bike bag, I’ve carried it, ridden with it, and put it through real conditions before I tell you it’s good.
  2. I don’t get paid for reviews.
    Yes, I earn a small commission through Amazon affiliate links—but that doesn’t change my opinion. I don’t accept free products from brands in exchange for biased reviews. If a product isn’t good, I won’t recommend it. Simple.
  3. I prioritize practicality over price.
    The cheapest gear is often a waste of money. The most expensive isn’t always the best. I look for gear that offers real value—durable, functional, and priced fairly.

What You’ll Find Here

This site focuses on gear that actually matters for everyday riders:

· Helmets – because safety comes first.
· Repair kits – because flats happen when you least expect them.
· Bike bags – for carrying what you need without clutter.
· Sunglasses – for protecting your eyes and reducing glare.
· And more – as I discover gear that works.

I’m not a professional cyclist. I’m a regular rider who loves being on two wheels. Everything I share comes from my own experience—the gear I’ve bought, the mistakes I’ve made, and the lessons I’ve learned.

A Quick Note About Affiliate Links

I participate in the Amazon Associates program, which means I earn a small commission when you purchase through links on this site—at no extra cost to you.

This is how I keep the site running. It allows me to continue testing, reviewing, and sharing my experience with you. It does not affect my recommendations.

If you ever have questions about a product I’ve recommended, or if you want to suggest something for me to review, feel free to reach out. I’m here to help.

Let’s Ride Together

Cycling has changed my life. It’s given me freedom, fitness, and a way to clear my head. I want the same for you.

Welcome to huaping2015.com. I’m glad you’re here.

Ride safe, and see you on the road. 🚴‍♂️


Cycling & Outdoor

What I Carry on Every Bike Ride – My 5 Essential Gear Picks

Disclaimer: As an Amazon Associate, I earn from qualifying purchases. All recommendations are based on my personal experience and real-world use.

Introduction

After 8 years of riding, I’ve learned one thing for sure: the gear you carry can make or break your ride. I’ve been stranded with a flat tire and no repair kit. I’ve had water bottles leak all over my bag. I’ve worn helmets that felt like a vice on my head.In this guide, I’ll share what gear to carry on bike rides based on my 8 years of experience.

Over time, I’ve refined my kit to the essentials that actually work. Here’s exactly what I bring on every ride—whether I’m commuting to work or hitting the trails.


  1. The Helmet That Finally Fits (and Doesn’t Look Bulky)
Retrospec Dakota helmet with ABS shell and 10 vents on a cyclist

I went through three helmets before I found the Retrospec Dakota. It’s lightweight, has 10 vents so I don’t overheat, and the adjustable dial makes it easy to get the right fit.

Key Features:

· ABS shell + EPS foam for impact protection
· 10 air vents for cooling
· Washable padding
· Dial-fit adjustment system

Who it’s for: Anyone who wants a reliable, comfortable helmet for commuting, BMX, skating, or just weekend rides.

👉 [Check price on Amazon]


  1. The Repair Kit That Saved Me Twice (So Far)
XCH Robots bike repair kit with mini pump and glueless patches

I used to carry a random collection of tools in my bag. Now I carry the XCH Robots Repair Kit—it has everything I need in one compact package.

What’s Inside:

· Mini pump for tire inflation
· Tire levers (2 pcs)
· 12 glueless patches (no rubber cement needed)
· Multitool for adjustments
· Waterproof tool bag to keep everything dry

Who it’s for: Any cyclist who wants to be prepared for flats without carrying a bulky tool box.

👉 [Check price on Amazon]


  1. The Water Bottle That Doesn’t Leak (Finally)

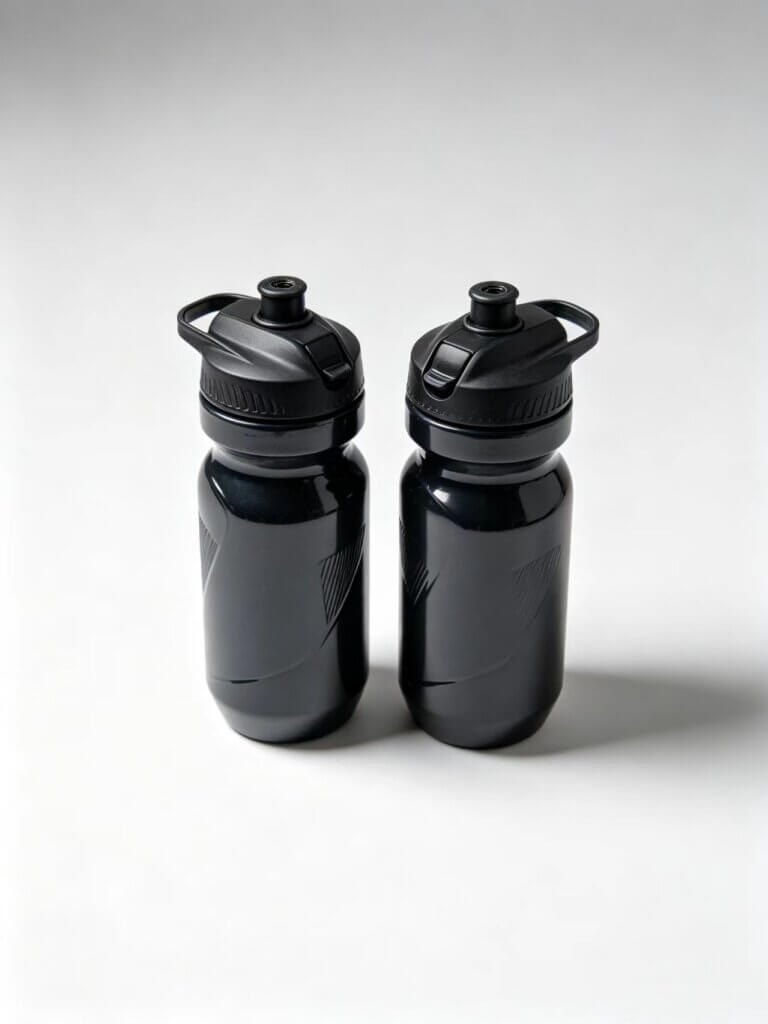
I’ve had water bottles that leak, bottles that are hard to squeeze, and bottles that taste like plastic. The HydraPak Breakaway Surge fixes all of that.

Why I Like It:

· High-flow self-sealing valve for fast hydration
· Leak-proof design
· BPA-free material
· Fits standard bike cages

Who it’s for: Riders who want reliable hydration on long rides without messing around with a leaky bottle.

👉 [Check price on Amazon]


  1. The Bike Bag That Keeps Everything Organized
JXFUKAL bike bag on a bicycle rear rack with waterproof hard shell

Before I had the JXFUKAL Hard Shell Rear Rack Bag, my gear was scattered across different pockets. Now everything has its place.

Why It Works:

· 9.5L capacity with inner mesh pockets
· EVA hard shell + PU coating (waterproof)
· Reflectors for nighttime safety
· Quick-release mounting

Who it’s for: Commuters and tourers who need to carry tools, snacks, a phone, and a change of clothes without clutter.

👉 [Check price on Amazon]


  1. The Sunglasses That Make Me Actually Want to Wear Them
KAPVOE cycling sunglasses with UV400 protection and interchangeable lenses

For years I didn’t wear sunglasses because they felt uncomfortable. The KAPVOE Cycling Sunglasses changed that. They’re lightweight and actually block the glare.

What I Like:

· 4 interchangeable lenses (yellow, clear, black polarized, etc.)
· UV400 protection (blocks 99.99% of harmful rays)
· Lightweight TR90 frame (only 34g)

Who it’s for: Anyone who wants affordable, functional eye protection for road or mountain biking.

👉 [Check price on Amazon]


Final Thought – Start With These 5 Essentials

You don’t need to buy everything at once. If you’re just starting out, I’d recommend investing in a good helmet and a basic repair kit first. Those are the two things that will keep you safe and get you home.

After that, add a water bottle, a bag, and sunglasses as you go.

Safe riding, and I’ll see you on the trails. 🚴‍♂️

Cycling & Outdoor

XCH Robots Bike Repair Kit Review 2026 – All-in-One Emergency Tool Set for Cyclists

Disclaimer: As an Amazon Associate, I earn from qualifying purchases. All recommendations are based on independent research and real-world product evaluation.


Introduction

Flat tires don’t wait for convenient moments. They happen on cold mornings, rainy evenings, and miles from home. When they do, you need a repair kit that’s compact, complete, and reliable.In this XCH Robots bike repair kit review, we’ll break down whether it’s worth adding to your saddle bag.

The XCH Robots Bicycle Repair Kit has become a top choice for cyclists worldwide. With a 4.5-star rating, nearly 10,000 global reviews, and Amazon’s Choice badge, it’s clearly trusted by thousands of riders. Over 4,000 units are bought on Amazon every single month.

But does this all-in-one kit actually deliver when you’re stranded on the roadside? In this XCH Robots bike repair kit review, I’ll break down exactly what’s inside, how it performs, and whether it’s worth adding to your saddle bag.


Key Features at a Glance

Feature Detail
Brand XCH Robots
Material Alloy Steel, Nylon, Plastic
Item Weight 1.76 ounces (ultra-lightweight)
Waterproof IPX4 water-resistant tool bag
Kit Includes Mini pump, multitool, tire levers, glueless patches, wrench set, and more
Patches 12 glueless patches (6 rectangle + 6 circle) – no rubber cement needed
Rating 4.5 ★★★★★ (9,886+ ratings)
Best Seller Amazon’s Choice
Monthly Sales 4,000+ units bought in past month


What’s Inside the Kit?

The XCH Robots kit comes packed with everything you need for roadside repairs:

Item Purpose
Mini Bicycle Pump Compact pump for emergency tire inflation
Bike Multitool Multiple hex wrenches for various bolt sizes
Tire Levers (2 pcs) For removing and installing tires
Glueless Patches (12 pcs) 6 rectangle + 6 circle – no rubber cement required
Crank Extractor & Wrench For crank and bottom bracket adjustments
Bone Wrench For spoke and hub adjustments
Waterproof Tool Bag IPX4-rated, keeps tools dry and organized


Why Choose the XCH Robots Repair Kit?

  1. Complete All-in-One Solution

This kit eliminates the need to buy individual tools separately. You get everything you need for common roadside repairs in one compact package. No more rummaging through multiple bags or forgetting essential tools.

  1. Glueless Patches – No Mess, No Waiting

Traditional patch kits require rubber cement, which dries out over time and creates a mess. The XCH Robots kit includes 12 glueless patches – simply peel and apply to the damaged area. They work instantly and require no drying time.

  1. Ultra-Lightweight – Only 1.76 Ounces

At just 1.76 ounces, this kit won’t weigh you down. It’s light enough to carry on every ride without adding noticeable bulk to your saddle bag or jersey pocket.

  1. IPX4 Waterproof Tool Bag

The included tool bag is IPX4-rated, meaning it can withstand splashes and light rain. Your tools stay dry and rust-free, even when you’re caught in unexpected showers.

  1. Trusted by Thousands – Amazon’s Choice

With over 9,800 ratings and the Amazon’s Choice badge, this kit has proven its reliability. The 4,000+ monthly purchases are a strong indicator of ongoing popularity and satisfaction among riders.


Pros & Cons

Pros Cons
✅ Complete 12-in-1 tool set ❌ Pump is compact – may take more strokes to inflate
✅ Glueless patches – no rubber cement needed
✅ Ultra-lightweight at 1.76 oz
✅ IPX4 waterproof bag included
✅ Affordable price ($23.89)
✅ Amazon’s Choice with 9,800+ ratings


Who Is This Kit Best For?

· Road cyclists who want a lightweight, compact emergency kit.
· Mountain bikers who need durable tools for trail-side repairs.
· Commuters who want peace of mind on daily rides.
· Weekend tourers who do multi-day rides and need reliable repair gear.
· Casual riders who want a complete set without buying tools separately.


How to Use the Kit

  1. Store it in your saddle bag – The compact size fits most under-seat bags.
  2. For a flat tire – Use tire levers to remove the tire, apply a glueless patch, and reinflate with the mini pump.
  3. For adjustments – Use the multitool to tighten loose bolts or adjust your seat/brakes.
  4. Keep it dry – The waterproof bag protects tools from moisture and rust.

Final Verdict – Should You Buy It?

The XCH Robots Bicycle Repair Kit is an excellent investment for any cyclist. For around $24, you get a complete, lightweight, and reliable emergency tool set that could save your ride – and your day.

My recommendation:

· Go for it if you’re a cyclist of any level who wants a compact, all-in-one repair solution.
· Consider it essential if you ride regularly and don’t already carry a repair kit – this is a small investment for peace of mind on every ride.


👉 Check the latest price on Amazon and order yours here


Thank you for reading! Ride prepared, ride confident. 🚴‍♂️


Cycling & Outdoor

Retrospec Dakota Helmet Review 2026 – Multi-Sport Protection for BMX, Skate & Scooter

Disclaimer: As an Amazon Associate, I earn from qualifying purchases. All recommendations are based on independent research and real-world product evaluation.


Introduction

Not every ride needs a dedicated road helmet. Sometimes you just need one helmet that does it all—whether you’re commuting, skating, or hitting the BMX track.In this Retrospec Dakota helmet review, we’ll break down whether it’s worth your money.

The Retrospec Dakota Adult & Youth Helmet has been taking the multi-sport market by storm. With a 4.5-star rating, over 8,000 global reviews, and the #1 Best Seller badge in Skateboarding Helmets, it’s clearly a favorite among riders and skaters alike. Over 1,000 units are bought on Amazon every single month.

But does it live up to the hype? In this Retrospec Dakota helmet review, I’ll break down its features, pros, cons, and who it’s best for.


Key Features at a Glance

Feature Detail
Brand Retrospec
Material ABS shell + EPS impact-absorbing foam
Ventilation 10 air vents for cooling
Padding Removable, washable padding
Fit System Adjustable dial for custom fit
Weight Lightweight for all-day comfort
Sizes Available in multiple sizes (Youth, Small, Medium, Large)
Colors Multiple color options available
Best For BMX, skating, scooters, cycling, multi-sport use
Rating 4.5 ★★★★★ (8,000+ ratings)
Best Seller #1 in Skateboarding Helmets
Monthly Sales 1,000+ units bought in past month


Why Choose the Retrospec Dakota Helmet?

  1. Multi-Sport Versatility – One Helmet for Everything

The Dakota isn’t just a bike helmet—it’s designed for BMX, skating, scooters, and cycling. Whether you’re commuting to work, skating at the park, or riding trails on the weekend, this single helmet covers all your action sports needs. No need to buy separate helmets for different activities.

  1. Superior Protection – ABS Shell + EPS Foam

The helmet features a durable ABS outer shell combined with impact-absorbing EPS foam. This dual-layer construction provides solid protection against impacts while keeping the helmet lightweight and comfortable.

  1. 10 Air Vents – Stay Cool All Day

With 10 strategically placed vents, the Dakota ensures excellent airflow during intense activity. Whether you’re skating on a hot summer day or climbing a steep hill on your bike, you won’t overheat.

  1. Removable & Washable Padding – Always Fresh

Sweat happens. The Dakota comes with removable, washable padding so you can keep your helmet fresh and odor-free. Just pop it out, wash it, and pop it back in.

  1. Adjustable Fit System – Perfect for Every Head

The dial-fit adjustment system lets you customize the fit in seconds. It accommodates different head shapes and sizes, ensuring a snug, secure fit without being too tight. Available in Youth, Small, Medium, and Large sizes.

  1. Thousands of Riders Can’t Be Wrong

With over 8,000 ratings and a consistent 4.5-star average, plus the #1 Best Seller badge, the Dakota has proven itself as a trusted, reliable helmet across multiple sports.


Pros & Cons

Pros Cons
✅ Multi-sport use (BMX, skate, scooter, bike) ❌ Not specifically designed for high-speed road cycling
✅ Durable ABS + EPS construction
✅ 10 vents for excellent airflow
✅ Removable, washable padding
✅ Adjustable fit system
✅ #1 Best Seller with 8,000+ reviews


Who Is This Helmet Best For?

· Skaters who need reliable head protection at the park.
· BMX riders looking for a durable, comfortable helmet.
· Scooter commuters who want a lightweight, ventilated helmet.
· Families who need one helmet that works for multiple kids and activities.
· Casual cyclists who ride around town and want a multi-purpose helmet.


Final Verdict – Should You Buy It?

The Retrospec Dakota Helmet is one of the best multi-sport helmets on the market. For around $30, you get:

· Versatile protection for multiple sports
· Solid safety construction with ABS shell and EPS foam
· Excellent ventilation with 10 air vents
· Washable padding for long-term freshness
· Adjustable fit for customized comfort

My recommendation:

· Go for it if you’re a skater, BMX rider, scooter commuter, or casual cyclist who wants one helmet for all activities.
· Consider a dedicated road helmet if you’re a high-speed road cyclist who needs lightweight, aero-specific designs.


👉 Check the latest price on Amazon and order yours here


Thank you for reading! Stay safe, stay protected. 🛴🚴‍♂️

Cycling & Outdoor

JXFUKAL Bike Bag Review 2026 – Waterproof Hard Shell Rear Rack Bag for Commuters & Tourers

Disclaimer: As an Amazon Associate, I earn from qualifying purchases. All recommendations are based on independent research and real-world product evaluation.


Introduction

If you’ve ever tried to stuff a pump, spare tube, phone, snacks, and keys into your jersey pockets, you know the struggle. For commuters and long-distance riders, a reliable bike bag isn’t a luxury—it’s a necessity.In this JXFUKAL bike bag review, we’ll break down whether it’s truly worth your money.

The JXFUKAL Bike Bag has been gaining serious traction on Amazon, with a 4.5-star rating, over 2,400 global reviews, and the #1 Best Seller badge in its category. With 2,000+ units bought in the past month alone, it’s clearly a popular choice among riders.

But is it the right bag for your setup? In this JXFUKAL bike bag review, I’ll break down its features, pros, cons, and who it’s best for.


Key Features at a Glance

Feature Detail
Brand JXFUKAL
Material EVA hard shell + PU coating
Capacity 9.5L / 17L / 40L options available
Waterproof Yes – water-resistant hard shell + included rain cover
Reflective Reflective accents for nighttime visibility
Mounting Rear rack mount with quick-release system
Dimensions (9.5L) 15.35 x 6.89 x 7.87 inches
Included Rain cover, shoulder strap, reflective decals
Rating 4.5 ★★★★★ (2,448+ ratings)
Best Seller #1 in its category
Monthly Sales 2,000+ units bought in past month


Why Choose the JXFUKAL Bike Bag?

  1. Hard Shell Waterproof Design – Built to Last

The bag is constructed from EVA hard shell material with a PU coating, making it sturdy, lightweight, and easy to clean. Unlike soft fabric bags that sag and lose shape, this bag stays solid and looks sharp on your bike. The included rain cover adds an extra layer of protection, so you never have to worry about sudden downpours ruining your gear.

  1. 9.5L Capacity – Spacious Enough for Daily Commutes

Don’t let the compact size fool you. The 9.5L main compartment is surprisingly roomy, featuring:

· 3 inner mesh pockets for organization
· An extra top pocket for quick-access items
· An adjustable elastic cord for securing bulky items

What fits? Bike tool kit, pump, wallet, phone, power bank, small speaker, towel, change of clothes, snacks, drinks, bike lock, sunglasses – and more.

  1. Reflective Accents & Tail Light Mount – Safety First

The bag features reflective decals that significantly increase nighttime visibility—a critical safety feature for commuters riding in low-light conditions. There’s also a designated tail light mount (light not included) for added visibility.

  1. Versatile Mounting – Fits Most Rear Racks

The bag mounts securely to most standard rear bike racks with a quick-release system. It’s compatible with bicycles, eBikes, and even scooters, making it a versatile choice for different types of riders.

  1. Multiple Size Options – Choose What Fits Your Ride

Size Capacity Best For
9.5L Single compartment Daily commuting, short rides
17L Expanded capacity Long-distance touring, grocery runs
40L Large compartment Extended trips, heavy hauling


What Real Riders Are Saying

With over 2,400 ratings, the feedback is overwhelmingly positive. Common praises include:

· “Solid construction – doesn’t flop around like soft bags.”
· “Completely waterproof even in heavy rain.”
· “Perfect size for my daily commute – fits everything I need.”
· “Easy to install and remove from the rack.”

Some users noted that the 9.5L is ideal for daily use, while the larger sizes are better suited for touring or grocery shopping.


Pros & Cons

Pros Cons
✅ Sturdy hard shell – holds shape ❌ Tail light not included
✅ Waterproof with included rain cover
✅ Large capacity with organized pockets
✅ Reflective accents for safety
✅ Easy to install and remove
✅ #1 Best Seller with 2,000+ monthly sales


Who Is This Bag For?

· Daily commuters who need to carry work essentials, lunch, or a change of clothes.
· Weekend tourers who want extra storage without adding a heavy pannier set.
· eBike riders who need a reliable, weatherproof storage solution.
· Grocery getters who make quick stops on their way home.


Final Verdict – Should You Buy It?

The JXFUKAL Bike Bag offers exceptional value for money. For around $40, you get a durable hard-shell bag with waterproof protection, ample storage, and safety features that rival bags costing twice as much.

My recommendation:

· Go for the 9.5L if you’re a daily commuter or weekend rider.
· Choose the 17L or 40L if you’re a long-distance tourer or need extra hauling capacity.

Whether you’re heading to work or hitting the trails, this bag will keep your gear organized, dry, and secure.


👉 Check the latest price on Amazon and order yours here


Thank you for reading! Ride safe, ride prepared. 🚴‍♂️


滚动至顶部